Raw Vegan Aged Semi-firm Cheeses. Two Flavours. Oil & Yeast Free
Yes! You can make your own aged dairy-free & raw vegan cheese! This cheese is slightly firm - but not hard - and pliable, although it can vary from semi-firm to very firm. You could even make this into a Swiss-style cheese, or ricotta, depending on the nuts/seeds and flavours you use, and how long you age it for! The options here are truly endless and entirely up to you. For this recipe I chose to use raw cashews. I created two flavours, both which taste AMAZING! I seriously cannot pick a favourite and neither could my family.
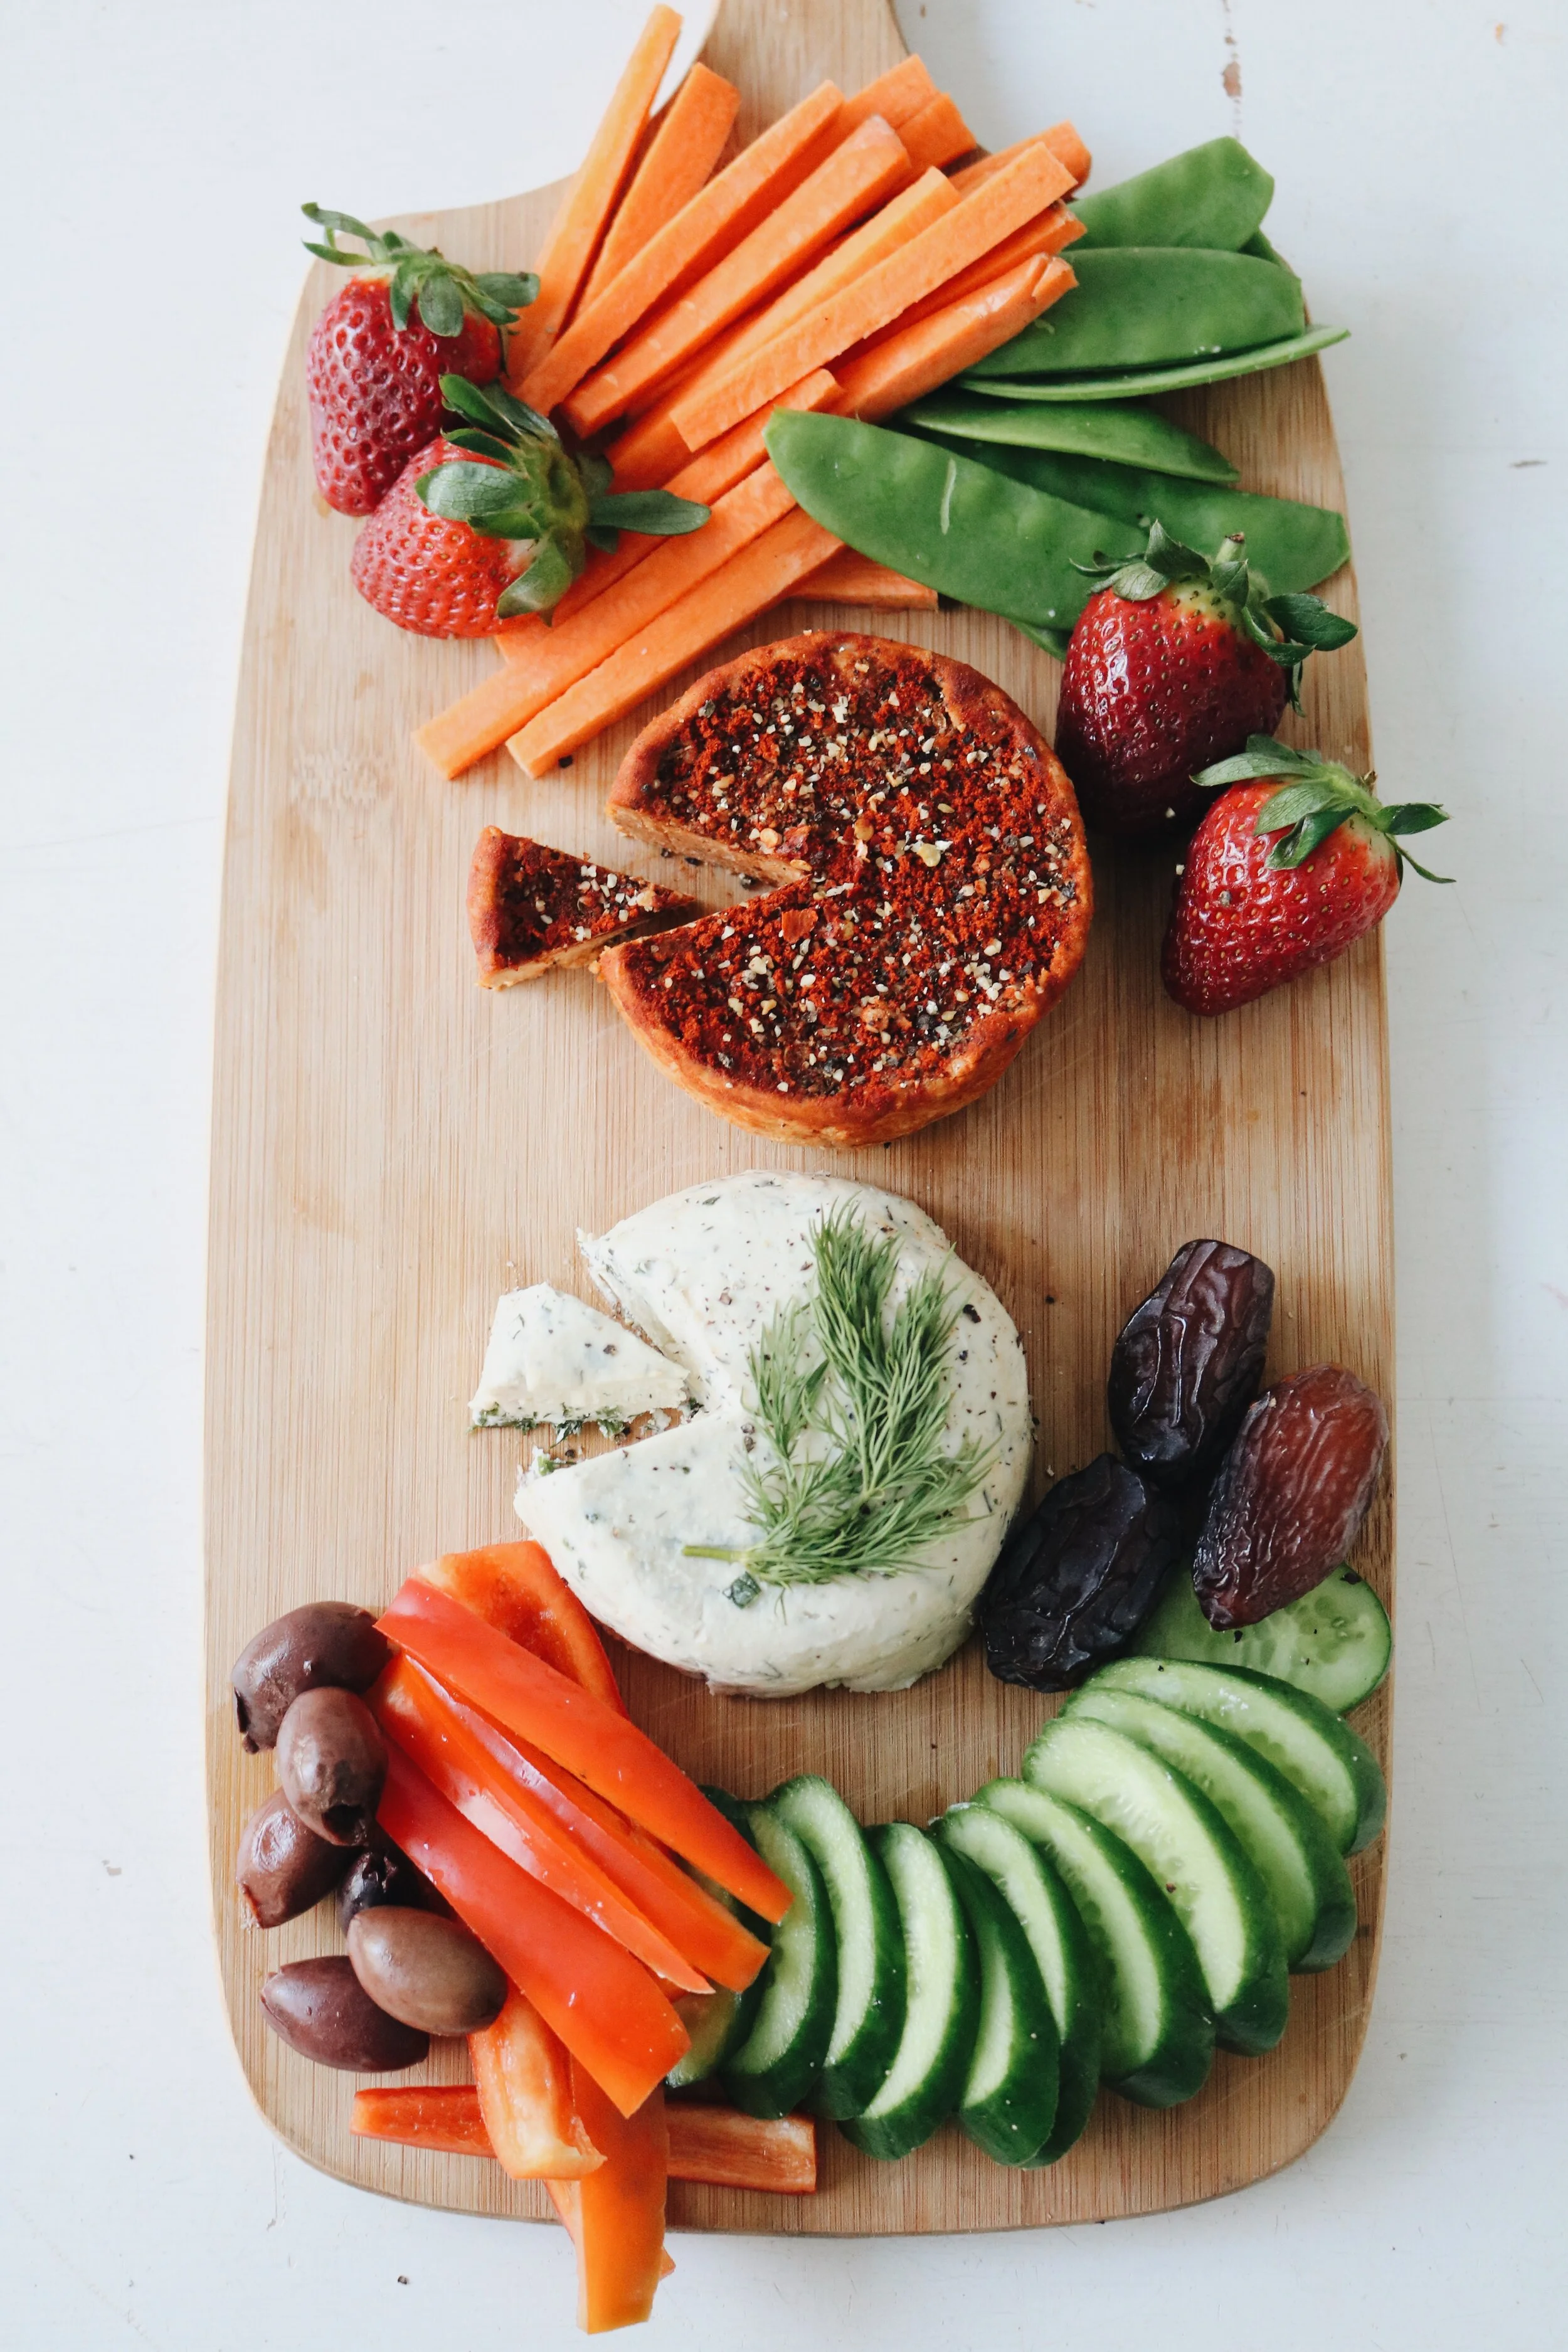
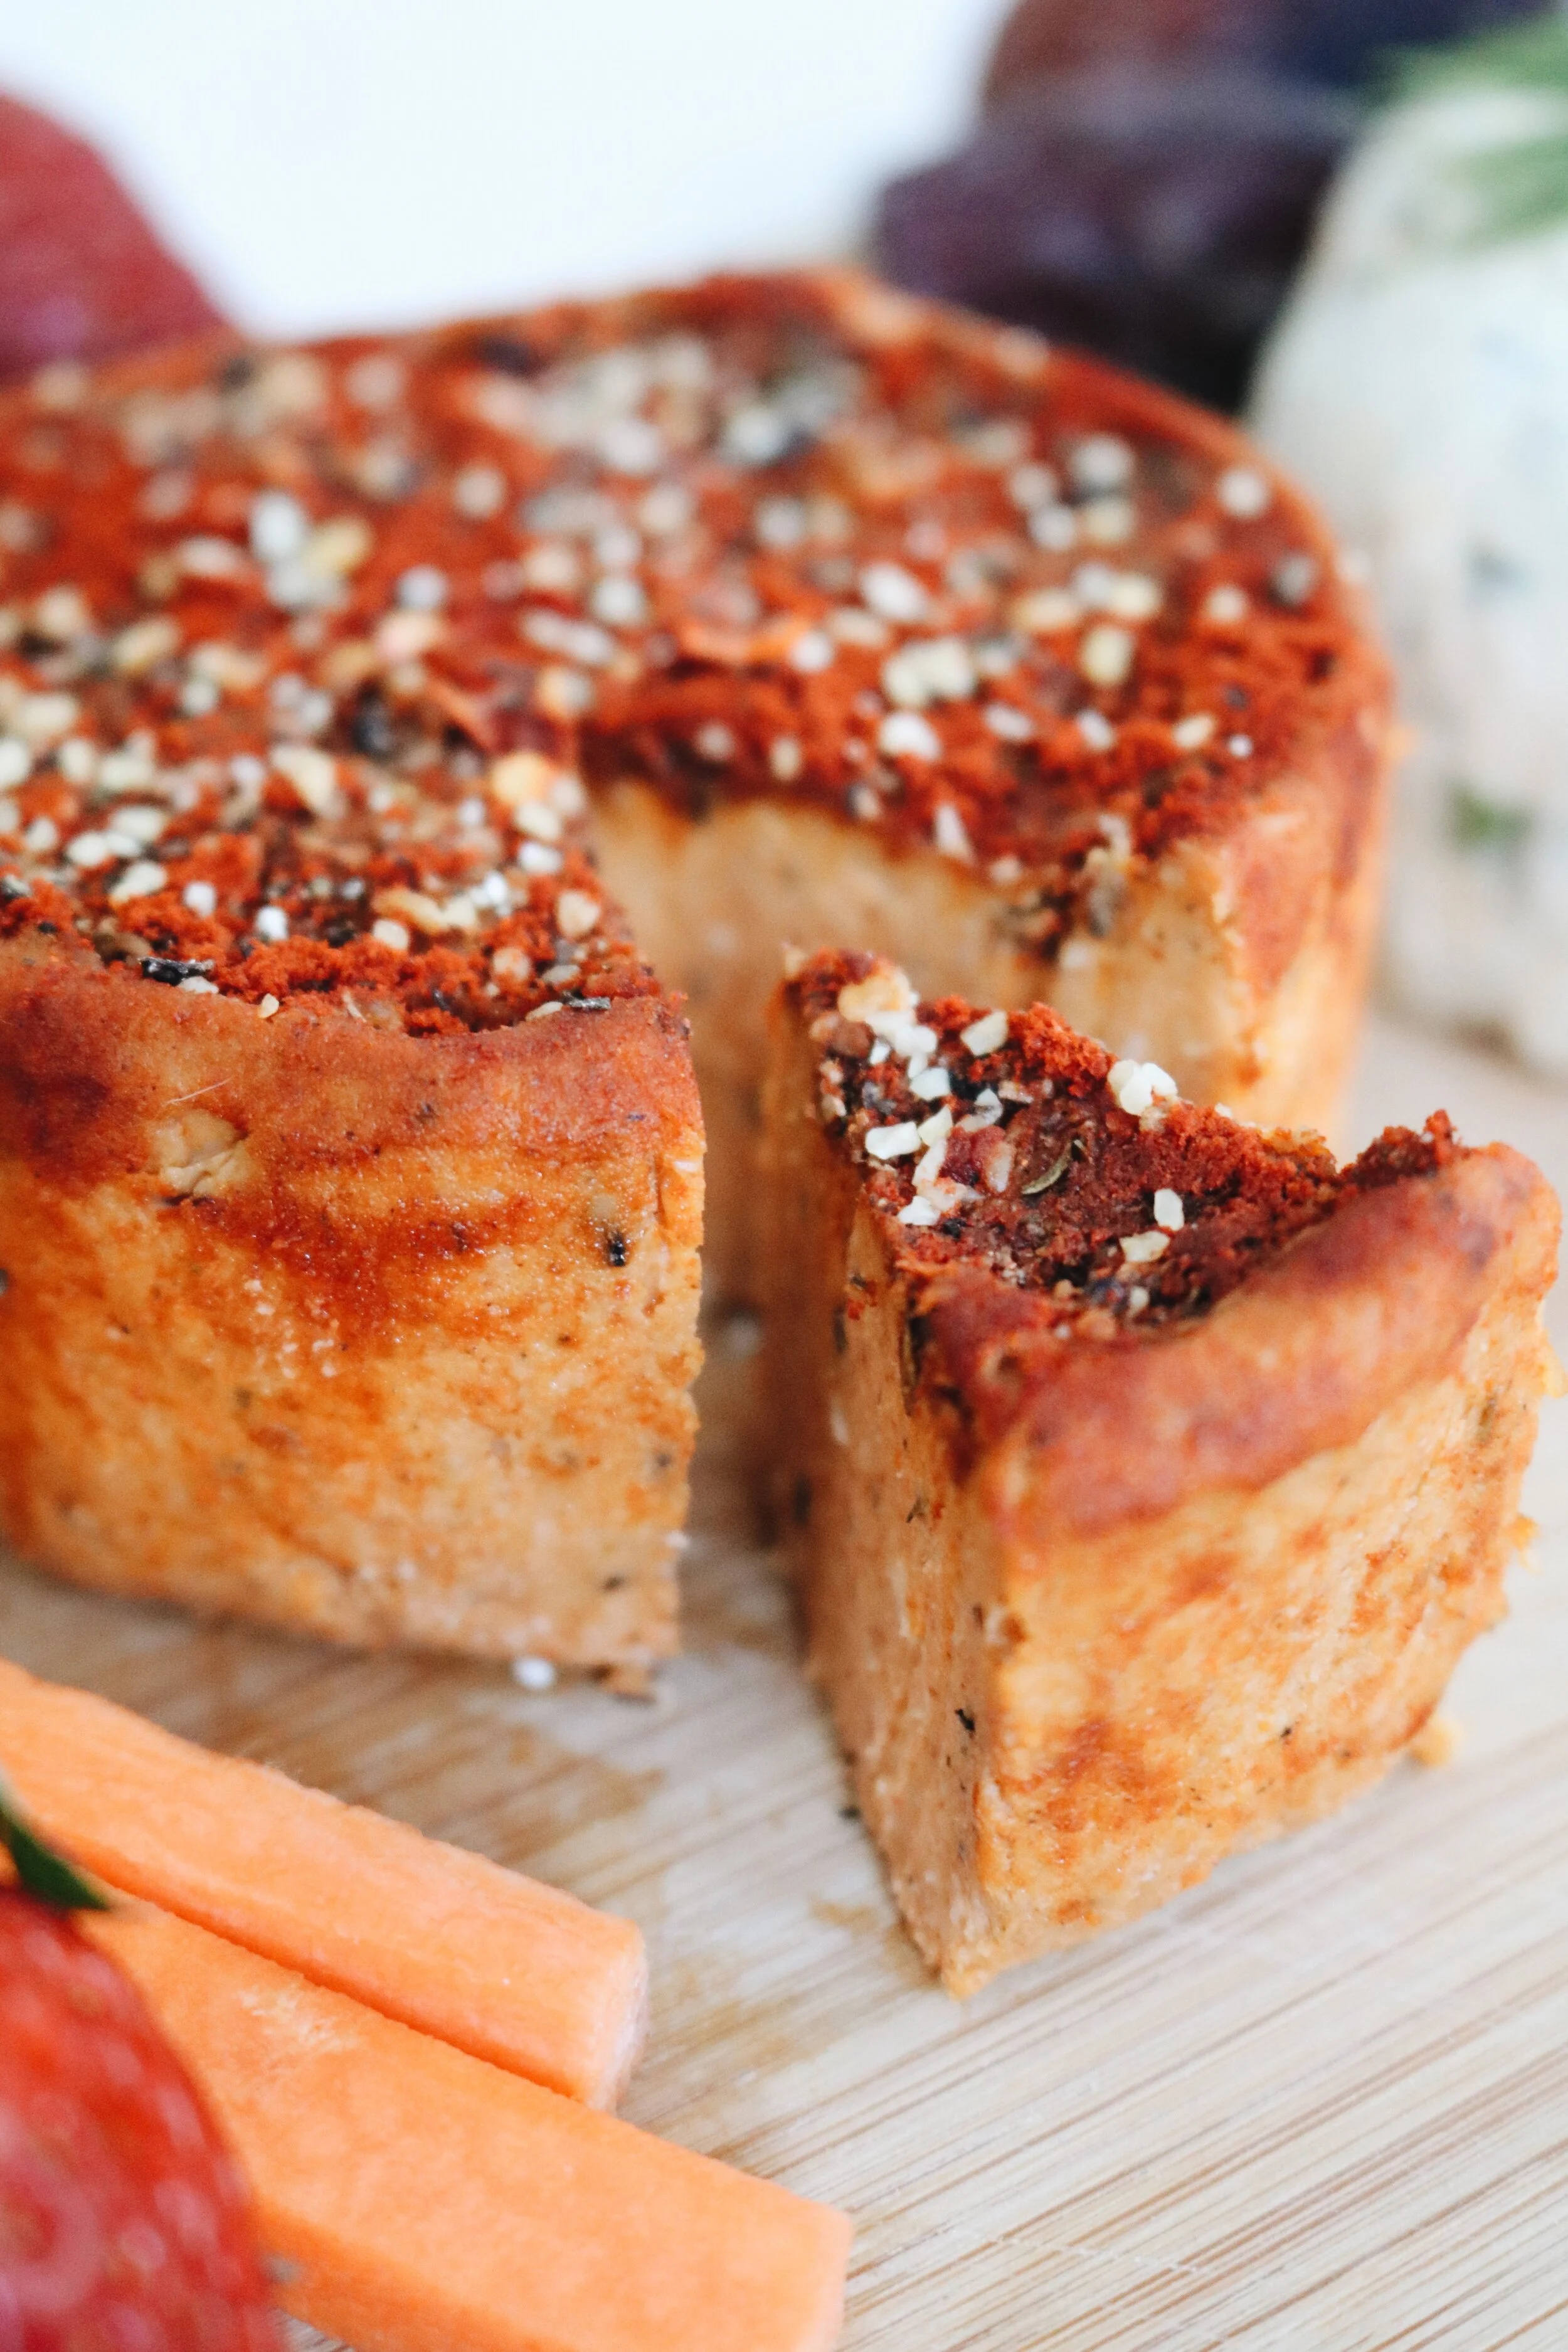
The first flavour I created is a chive, dill, garlic cheese. The second is a sweet & smokey paprika & chilli cheese.
I really wanted these cheeses to be both yeast & oil free. A lot of raw vegan cheeses that I've seen in the health food stores & recipes online either have nutritional/savoury yeast, or olive, coconut or truffle oil. I'm not a fan of yeast or oil, and in my opinion you don't even need to add these in for it to taste good. Some of my friends, including myself, have felt quite sick in the past from eating cheeses with yeast or dense with oil. After eating these clean cheeses I created, my tummy & digestion felt GREAT. I didn't have a full, nauseous, heavy or bloated feeling like I would experience after consuming dairy cheese or nut cheese with added nasties. These yeast & oil free cheeses taste INCREDIBLE, fresh & light! If you gave these to a non-vegan, they wouldn't be able to tell its free of dairy... except they'd feel a whole lot more clear-minded and lighter after eating it VS eating dairy!
These cheeses were so much fun to make, and I enjoyed experimenting with the fermentation & ageing process! I served these cheeses on a cheese board with some freshly cut up carrots, cucumber, capsicum, and snap peas, as well as some olives and strawberries. You could also serve with some pears, grapes, figs, or raw dehydrated veggie crackers too.
The beauty of making these raw cheeses is that the base can be any kind of nut or seed. I choose to use cashews for the white colour but you can alternatively use skinned almonds, pistachios, macadamias, brazil nuts, sunflower seeds, hemp seeds, pumpkin seeds, pine nuts... whatever you desire or have in your kitchen at the time!
You can also choose to age the cheese in whatever shape you'd like. If you have a small rectangular container- you could make a cheese block and slice it up that way. Or if you have circular dish, use that as a mold and cut your cheese up like a pie!
Warning- this is insanely delicious so I encourage you to make extra. You will not want to stop eating it hahaha.
Ingredients
For the dill, garlic, chive cheese
2 cups raw cashews soaked overnight in kangen water 9.5pH or 11.5pH
3 probiotic capsules
1/2 cup finely chopped fresh dill
1/2 cup finely chopped fresh chives
3 tsp garlic powder
3 tsp onion powder
2 tsp finely milled sea salt
1/2 tsp pepper
2 tsp herbamare seasoning herb salt
3 tbsp lemon juice
For the sweet & smokey paprika & chilli cheese
2 cups raw cashews soaked overnight
3 probiotic capsules
3 tsp paprika
1/2 tsp chilli
4 tsp mingle all purpose seasoning
3 tsp garlic powder
3 tsp onion powder
2 tsp herbamare seasoning herb salt
Optional- 2 tsp smoked paprika (use if you'd like it to have a smoked flavour)
3 tbsp lemon juice
*This is all about your own creativity- I encourage you to add what you like to it!*
Method
Soak your cashews (or nut or seed of choice) in kangen water 9.5pH or 11.5pH overnight.
In a blender or food processor, grind up your cashews. It is important that the cashews are soaked overnight so that they have a high-water content (absorbed when soaking). This will make them easier to blend and will prevent you from having to add too much additional liquid.
Add in your probiotic capsules to the mix.
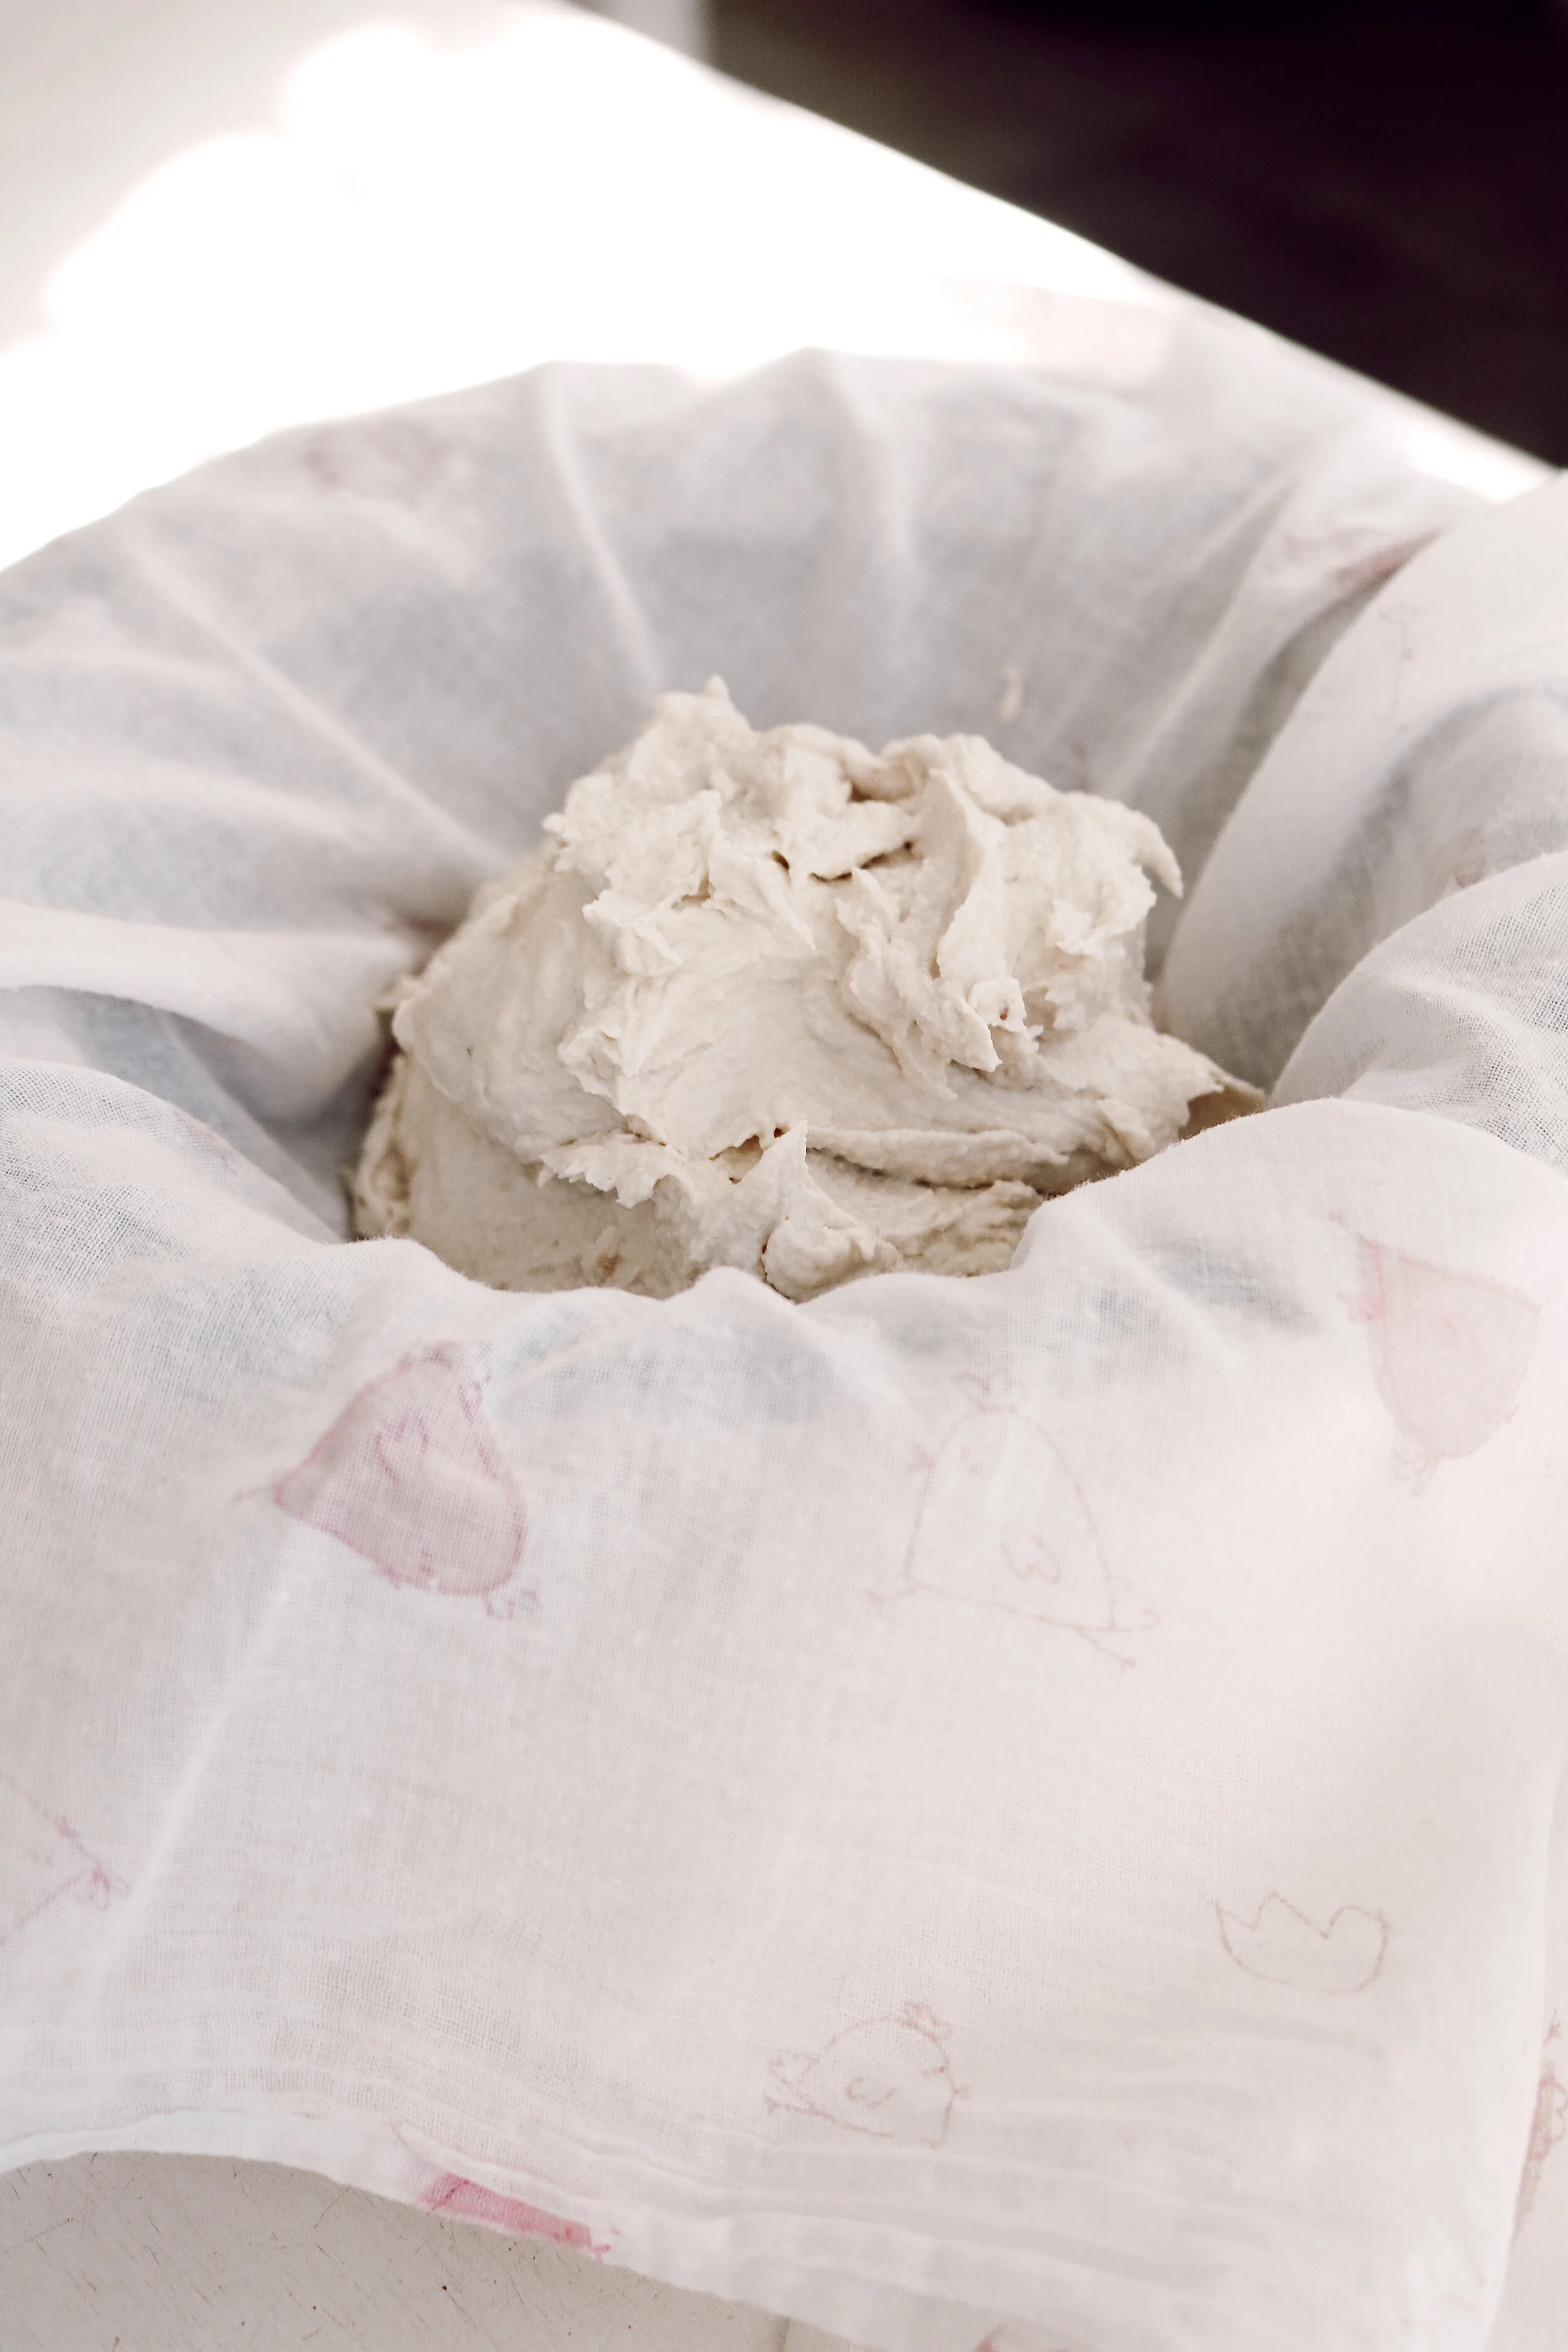
Add small amounts of water at a time when blending. You want to get the cashew blend to be smooth with no chunks or a rough texture, while still being thick and creamy. You can always add in water but you can't take it out! So be slow & patient with this :)
Take out a teaspoon of of the cashew mixture and run it between your fingers, if its grainy, keep blending, if its smooth and silky- good job!
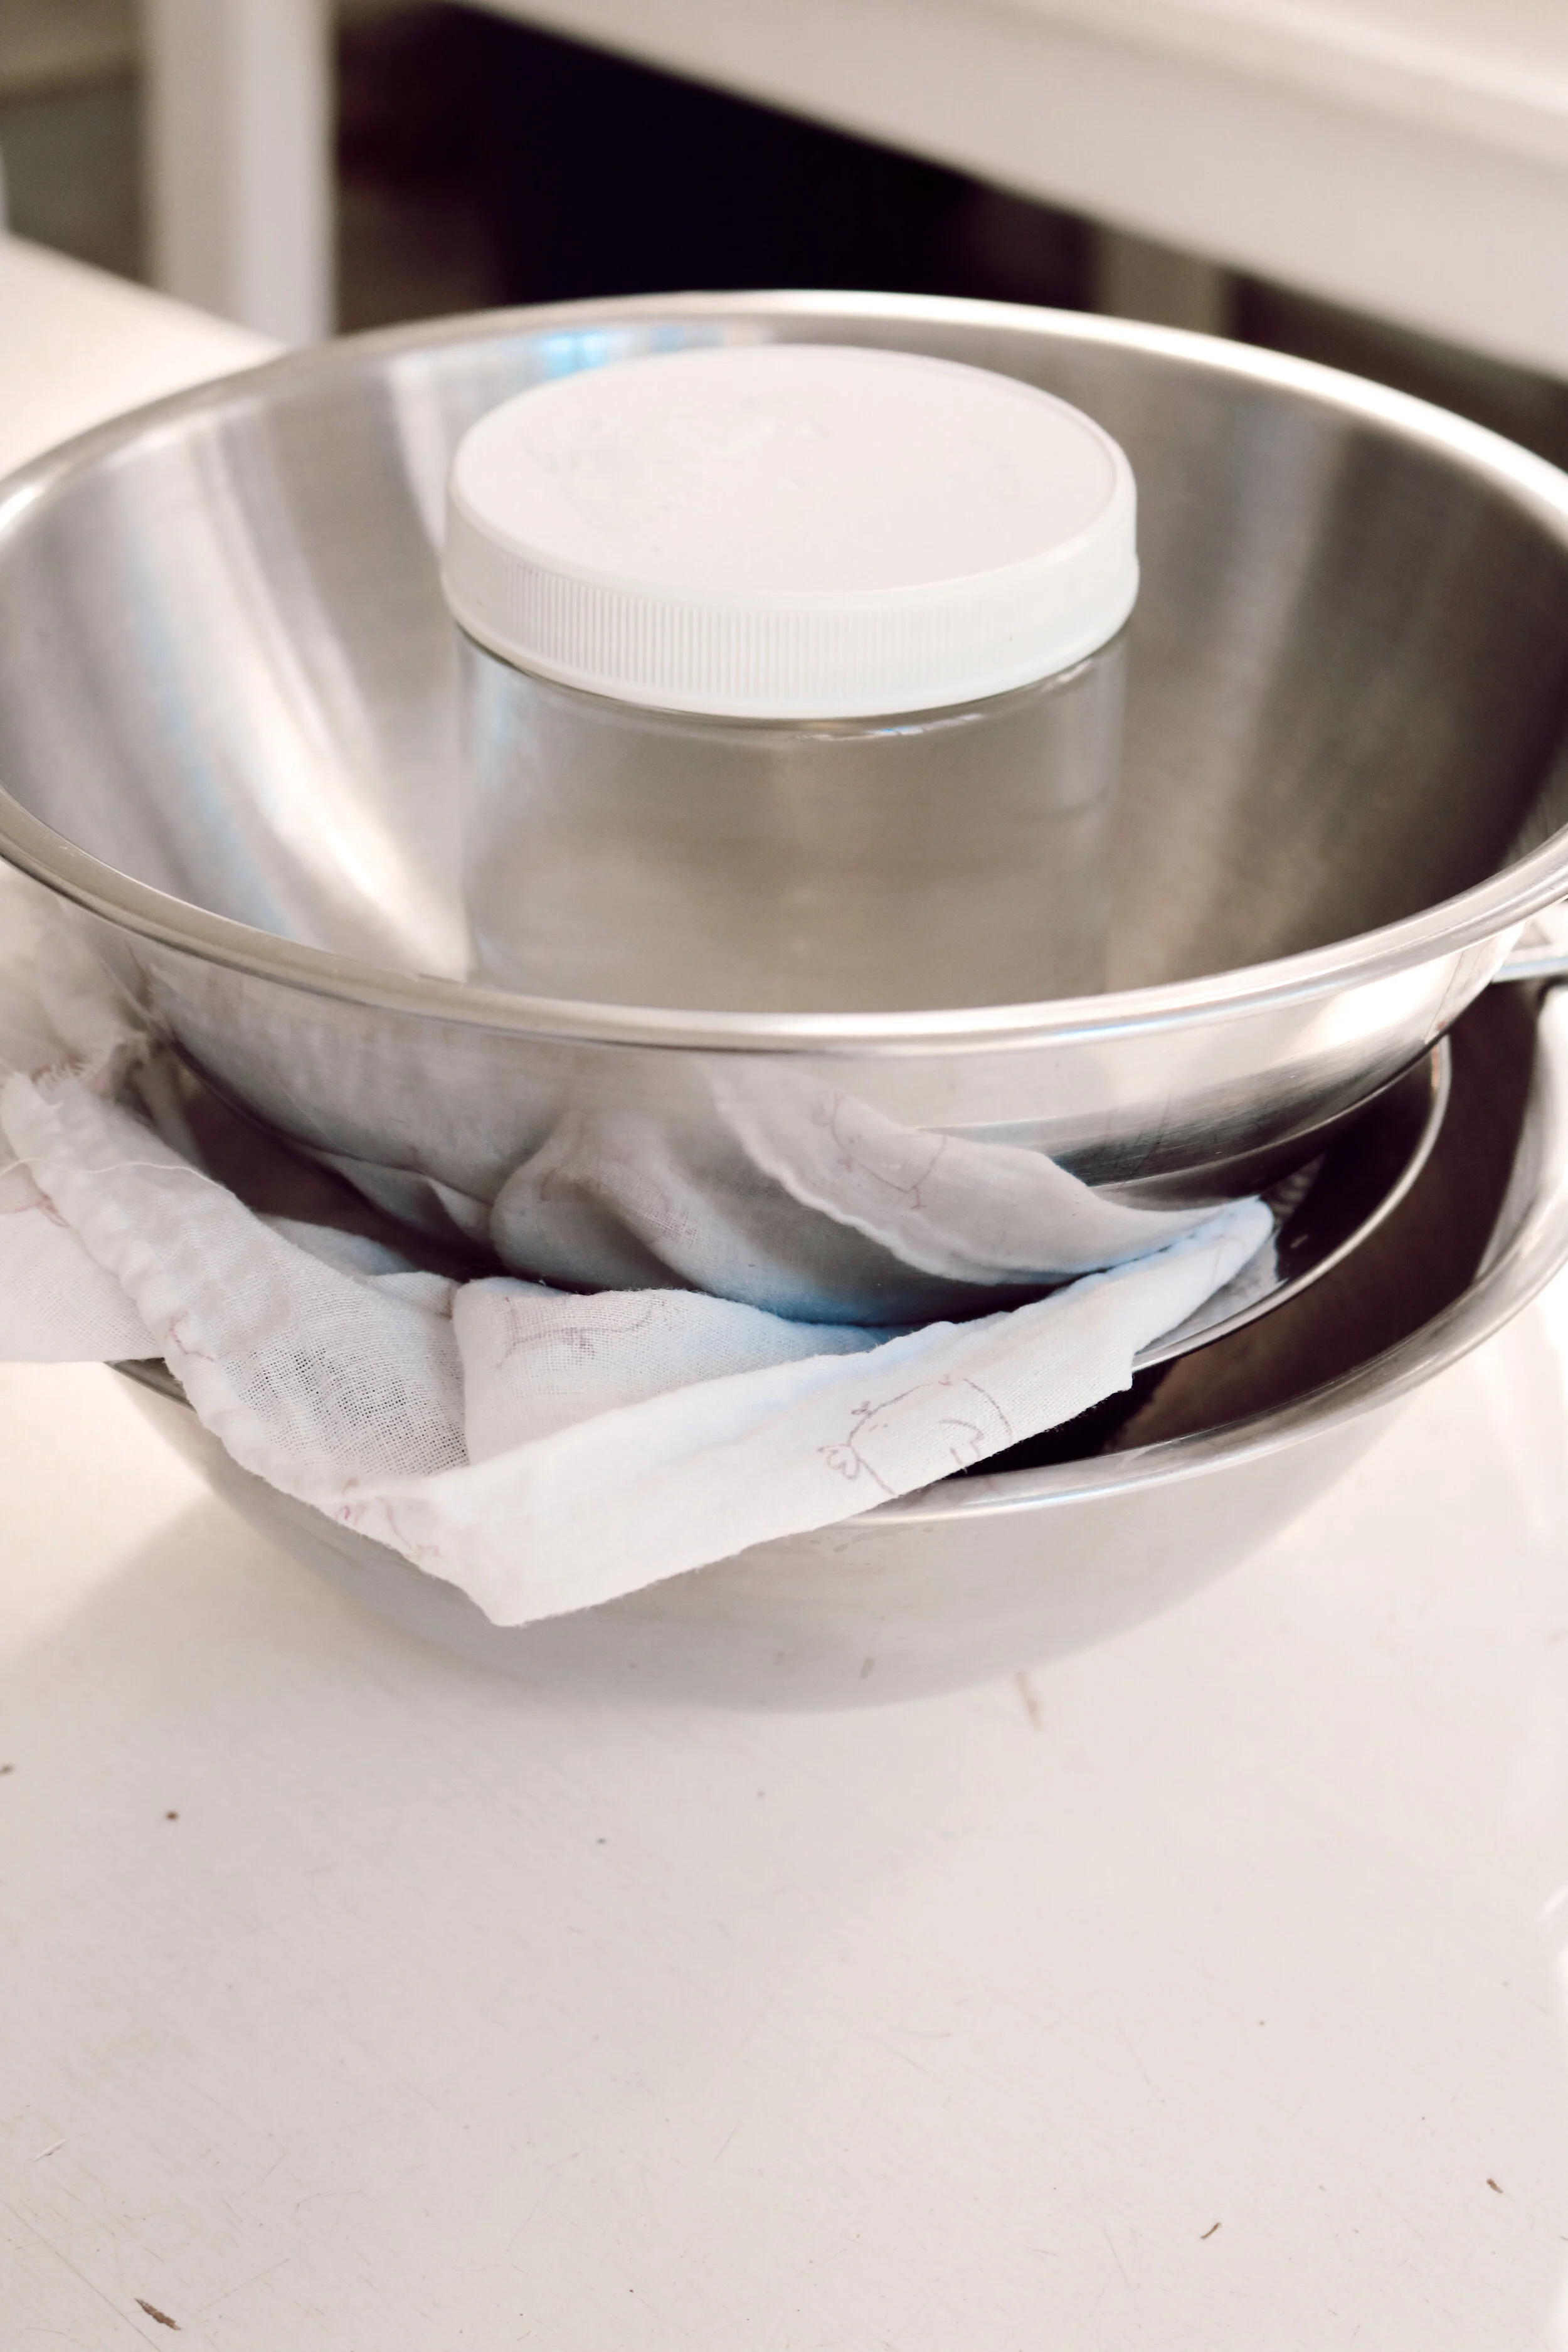
Next is the fermentation process. Put the cheese mixture into a cheese cloth or a thin piece of cotton/linen. Then put this bag of cheese into a strainer over a bowl. Add weight to the top of the cheese by getting a jar of water and placing it on top of the cheese with a bowl separating the cheese bag and the jar. Leave to ferment on a counter for a minimum of 24 hours. The weight on top of the cheese will also squeeze out any liquid into the bowl below. If you are fermenting anything else at the same time, eg kombucha- KEEP THEM SEPERATE. Don't put the cheese and kombucha/coconut yogurt etc near each other.
(When other food items are fermenting in close proximity to the cheese it ruins the cheeses fermentation process. Different cultures contain and need different kinds of bacteria for a successful ferment. It’s all about cross-contamination. You see, bacteria are microscopic beings. They are floating about in the air all around us all the time.)
After fermenting your cheese for 24 hours (or longer), take it out of its cloth and put it into a bowl. It should have a lovely cheesy aroma. Now is the time to add in your spices and herbs & lemon juice. Mix in your powdered spices and herb blends for the flavoured cheese you are making. Note- using powdered garlic and onion, rather than fresh bulbs of garlic or onion, work much better for this recipe.
Start with a small amount of each herb/spice/flavour, and then add more. I encourage you to taste test along the way and create a mixture that is perfect for your taste buds! (Eg-some people love lots of garlic or chilli, whilst others only enjoy a subtle hint of it).
After mixing in your herbs, lemon juice & spices- you can totally enjoy the cheese just like this as a cream cheese dip! If you would like to enjoy it as a semi-firm aged cheese. Continue with the following method.
Next put your cashew cheese into a mold. you can use a circular bowl (preferably with a flat bottom and straight sides to achieve the shape of the cheese I made) or a rectangular container. Line the mold your'e using with cling wrap. If you'd prefer not to use plastic you could probably also use a very thin cloth. Put the cheese mixture into the mold and fold the plastic over the top to cover the cheese.
Put the cheese in the back of your refrigerator and let the cheese age for a minimum of 3 weeks. I let these two cheeses age for exactly 3 weeks and the texture was semi-soft & slightly firm- perfectttt!
I recommend that you get a post-it-note and write the date you put the cheese in on the side of the mold, or put an alert reminder in your phone set 3 weeks ahead that you can take out the cheese :)
OPTIONAL - After the 3 week ageing process. You can take your cheese out of the mold and pop it in the dehydrator for 1-2 hours at 35 degrees to form a very thin 'crust layer' on the cheese. This will make the outside less sticky and make it look identical to ordinary cheese! If you add decorative spices to the top of your cheese, dehydrating it for a short amount of time will also make the top nice and crisp to cut into. It may loose its shape a little bit but you can put it back in its mould and pop it into the refrigerator again so that the cheese is chilled before serving.
Serve your cheese on your favourite cheese board with veggies, crackers, fruit - whatever you'd like! Or store it in the fridge and use on wraps, sandwiches, pizzas, crumble on salads, pastas... it can go beautifully with anything!


